| |
|
|
| |
Audio marker in Dexster Audio Editor can be useful to mark an important specific audio position or selected region. The marker list can then be used as a quick navigation that helps you to return to the marked position or region. You can also add a label description for each of the markers to explain its purposes. In the article below, we'll teach you how to use audio marker in the Dexster Audio Editor software so that you can use it for your audio editing task. |
| |
Open Audio File for Editing |
| Click on the Open button on the toolbar and select audio file for editing. |
| |
Add to Marker List |
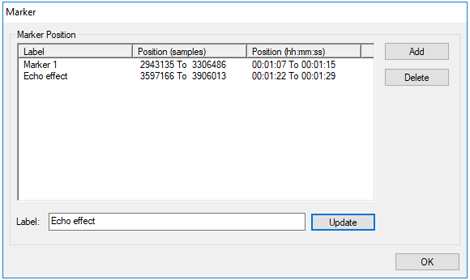
| Once the audio file is loaded, make selection on the waveform area that you would like to add to the marker list. You can also use the Selection Range tool on the right panel to manually enter the selection start and end time. Then, click on the View menu and select Marker List. Enter label description for the marker and click on Add button to add the selected region to the marker list. Click on OK button to close the Marker List. Two straight dotted blue lines will now appear on the waveform. This indicates the start and end selection of a marker. |
 |
| |
Delete a Marker |
| In order to delete a marker, Click on the View menu and select Marker List. From the list, select the marker you would like to delete, and click on the Delete button. Dexster will then remove the marker from the list. |
| |
Navigate to a Marker |
| |
To navigate to a marker, open the marker list window, and double click on the marker listing you would like to navigate. Dexster will then navigate and highlight the marker selection region. |
| |
|
| |
|
| |
 |
Dexster Audio Editor |
| Price: USD 45 |
| for Windows 7, 8, 10, 11 |
| |
 |
 |
| |
|
|
| |